
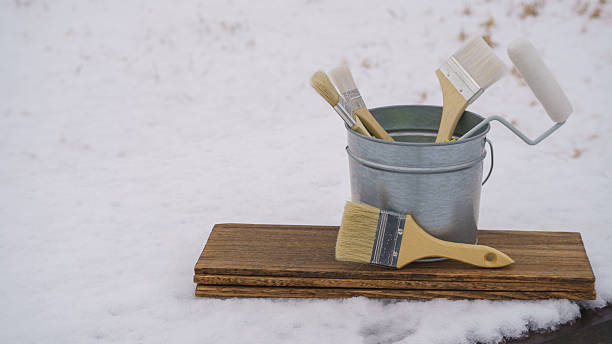
When it comes to painting, people usually think about rollers, expensive brushes, and all the equipment that makes a project look professional. But some of the most useful tools are also the cheapest ones. A chip brush is a good example. These simple brushes might not look like much, yet they can handle plenty of jobs before, during, and after painting. Using a 3 in chip brush can make it easier to remove loose dust, spread certain coatings, apply wood finishes, or reach awkward corners where larger brushes struggle. They are not made for every painting task, of course. Still, if you understand where they work best, they can save time and keep a project moving without much fuss.
What Makes a Chip Brush Different?
A chip brush usually has natural or synthetic bristles, a basic wooden handle, and a metal band holding everything together. It is generally inexpensive and often sold in packs, which makes it practical for messy jobs. Unlike a quality finishing brush, a chip brush is not always designed to deliver a perfectly smooth coat. Some shed bristles, and the overall finish can vary depending on the brush itself. That doesn’t make it useless. Quite the opposite, really. For jobs involving adhesives, stains, sealers, or general surface preparation, spending extra money on a premium brush may not make much sense. You can use a chip brush where precision isn’t the main concern, then keep your better brushes for work that needs a cleaner finish.
Using Chip Brushes for Surface Preparation
A decent finish starts long before the paint can comes open. Surfaces need to be clean, dry, and free from loose material, otherwise even good paint can struggle to stick properly. Chip brushes help with the smaller preparation jobs, especially when working around grooves, trim, wood joints, and detailed surfaces. Their bristles can reach into places where a cloth may miss dust and loose particles. They are also handy for brushing away debris after light sanding, although stubborn dust should be removed using an appropriate vacuum or tack cloth when the coating instructions call for it. One thing worth remembering is that a chip brush does not replace proper cleaning, scraping, or sanding. It supports those steps. If grease, peeling paint, or heavy residue remains underneath the new coating, brushing over it won’t magically fix the problem.
Applying Stains, Sealers, and Protective Coatings
Chip brushes are useful when applying wood stains, primers, sealers, and certain protective coatings. Their simple construction makes them a reasonable choice for products that can leave a brush difficult to clean afterward. For example, when sealing a rough timber edge or coating the inside of a wooden box, you may not need the control of an expensive finishing brush. A chip brush can spread the product across the surface and push it into small gaps. The important part is choosing bristles that are compatible with the coating. Check the product label, especially when working with solvent-based materials, because some brush materials may soften or deteriorate. Apply the coating in manageable amounts, too. Loading the brush heavily can leave drips, thick patches, and uneven coverage. A little patience usually gives better results than trying to finish the whole job in one quick pass.
Reaching Corners and Working on Awkward Surfaces
Large brushes and rollers are great for broad, open areas, but they can become frustrating around narrow edges and detailed sections. Think about the back of a cabinet, the inside of a wooden frame, metal brackets, or the corners of a workshop shelf. These are places where a smaller chip brush earns its keep. You can work the bristles into tight spaces without repeatedly repositioning larger equipment. It also helps when coating irregular surfaces that have small dips or rough patches. Just don’t expect every brush to perform the same way. Cheaper models sometimes lose bristles, so check the brush before using it on a surface where stray fibers could spoil the result. Pulling away loose bristles before starting takes seconds. Picking them out of wet paint later is a different story.
Getting Better Results During the Finishing Stage
Preparation and finishing are connected, but they are not quite the same thing. Once the surface is clean and ready, the goal shifts toward even coverage and a consistent appearance. A chip brush can work well for applying a thin coat of sealer, touching up small areas, or coating edges that a roller cannot reach properly. Use light, steady strokes instead of pressing hard, since excessive pressure can leave streaks or force too much product into one spot. If the coating requires a smooth decorative finish, a higher-quality brush may be the better option. Chip brushes are more forgiving when the job is practical rather than decorative. They also work well for small repair projects where buying specialist equipment would cost more than the task itself.
Pairing Chip Brushes With Other Painting Tools
No single tool needs to handle an entire painting project. A chip brush can manage corners, narrow edges, and small preparation jobs, while a roller covers larger walls and flat surfaces more quickly. For broad interior painting, choosing the right roller nap and material matters just as much as selecting the brush. For instance, 9 inch paint roller covers are useful for covering ordinary wall sections efficiently, while a chip brush can deal with the spots a roller cannot reach cleanly. You might brush around trim and tight corners first, then roll the main surface while maintaining a workable edge. The exact order depends on the coating and the surface, so follow the manufacturer’s instructions. The idea is simple: use each tool where it performs best, rather than forcing one tool to do everything.
Cleaning, Storage, and Knowing When to Replace One
Chip brushes are cheap enough that replacing them is sometimes easier than cleaning them, particularly after using certain adhesives or coatings. Still, reusable brushes can last longer if you clean them correctly. Follow the coating manufacturer’s cleaning instructions, use the appropriate solvent when required, and never pour leftover chemicals down a drain. Let the brush dry before storing it, and keep it somewhere clean so dust doesn’t collect between the bristles. If the bristles have become stiff, bent, or loose, replace the brush before starting another job. A worn brush can leave debris behind and make an otherwise simple task annoying. There is no real benefit in trying to squeeze another use out of a brush that keeps shedding fibers.
Conclusion: A Practical Tool Worth Keeping Around
Chip brushes aren’t fancy, and that’s part of their appeal. They are affordable, easy to replace, and useful for a surprising range of preparation and finishing tasks. From clearing light dust out of small grooves to spreading stains and reaching awkward corners, they can handle jobs that don’t justify bringing out expensive equipment. The trick is knowing their limits. For detailed decorative work, a better brush may be necessary, while rollers remain the sensible choice for covering larger areas. Keep a few chip brushes in your toolbox, choose the right one for the coating, and use it where precision requirements are reasonable. Sometimes, the simplest tool is the one you reach for most often.