A roof is one of the most important components of any home. It protects your family, belongings, and property from rain, wind, extreme temperatures, and other environmental conditions. However, even a well-installed roof can develop problems over time. Damaged shingles, deteriorating flashing, clogged gutters, poor attic ventilation, and hidden moisture can gradually compromise its performance.
The challenge is that many roofing problems are not immediately visible from the ground. A roof may look perfectly fine from the outside while water slowly enters through a damaged seal or deteriorating roofing material. This is why scheduling a professional roof inspection is an important part of responsible home maintenance.
A qualified roofing professional examines the roof’s visible surfaces, drainage system, structural components, and accessible attic areas to identify potential issues before they become expensive repairs. The inspection also helps homeowners understand the roof’s current condition, prioritize maintenance, and make informed decisions about repairs or replacement.
Whether your roof is relatively new or approaching the end of its expected service life, understanding what an inspector looks for can help you prepare for the appointment and recognize the value of a thorough evaluation.
In this guide, we explain the 12 most important things a professional roof inspector checks during an inspection, why each component matters, and how regular inspections can help protect your home.
Why Is a Professional Roof Inspection Important?
A professional roof inspection is more than a quick visual check for missing shingles or obvious leaks. It is a systematic assessment designed to identify visible damage, developing maintenance concerns, drainage problems, and signs of deterioration.
Regular inspections can help homeowners:
- Identify minor roofing issues before they develop into major repairs.
- Detect potential water intrusion and moisture damage.
- Evaluate the condition of roofing materials and flashing.
- Assess gutters and drainage performance.
- Recognize ventilation and insulation concerns.
- Document storm damage and existing roof conditions.
- Plan future maintenance and roof replacement more effectively.
Inspections are particularly valuable after severe weather, when purchasing or selling a home, before undertaking major renovations, or when a roof begins showing signs of aging.
The exact inspection process depends on the roof’s material, slope, accessibility, age, and local weather conditions. A qualified inspector should explain which areas were examined and identify any areas that could not be safely accessed.
1. Roof Shingles and Roofing Material Condition
The first thing a professional roof inspector checks is the condition of the primary roofing material. This material forms the roof’s main protective barrier against the elements, so deterioration can directly affect its ability to keep water out.
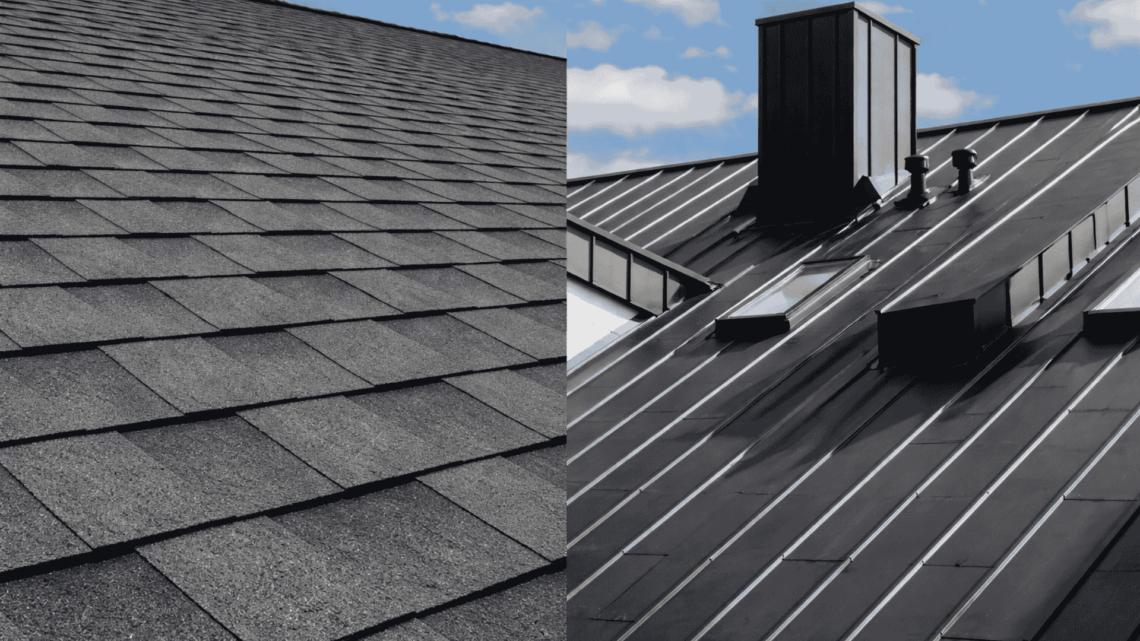
For asphalt shingle roofs, the inspector looks for missing, cracked, curled, blistered, loose, or damaged shingles. They may also examine granule loss, exposed fasteners, and areas where shingles appear uneven or have lost their protective surface.
Granules help protect asphalt shingles from ultraviolet radiation and weather exposure. Excessive granule loss can indicate aging, surface deterioration, or storm-related damage. Although some granule shedding is normal, concentrated accumulation in gutters or visibly worn patches deserve further evaluation.
For metal roofs, inspectors look for corrosion, damaged coatings, loose fasteners, separated seams, dents, and signs of water penetration. Tile roofs require attention to cracked, broken, displaced, or missing tiles, while slate roofing needs careful evaluation for damaged or slipping pieces.
The inspector also considers the roofing material’s approximate age and expected service life. However, age alone does not determine whether replacement is necessary. Installation quality, maintenance history, climate, and exposure to severe weather all influence roof performance.
Why it matters: Identifying damaged roofing materials early can help prevent water intrusion, protect the underlying roof deck, and extend the useful life of the existing roof when appropriate repairs are possible.
2. Flashing Around Roof Joints and Openings
Flashing is one of the most important components evaluated during a roof inspection because it helps prevent water from entering at joints, intersections, and openings.
Roof flashing is commonly installed around chimneys, skylights, plumbing vents, dormers, roof-to-wall connections, and other areas where roofing materials meet a different surface.
These locations can be vulnerable because rainwater follows changes in roof direction and may collect around poorly protected joints. Even a relatively small gap can allow moisture to enter the roof structure.
During a professional roof inspection, the inspector examines flashing for:
- Loose or lifted metal sections.
- Rust, corrosion, or physical damage.
- Gaps around roof penetrations.
- Cracked or deteriorating sealant.
- Improper overlaps or visible installation defects.
- Signs of previous repairs that may have failed.
The inspector also checks whether flashing is appropriately integrated with the surrounding roofing materials. Applying additional sealant is not always the correct solution. Some problems require the flashing to be repaired or replaced to restore proper water management.
Flashing should also be assessed according to the roof system and manufacturer’s installation requirements. Different materials and roof designs require different detailing methods.
Why it matters: Defective flashing can cause recurring leaks even when the surrounding shingles, tiles, or metal panels remain in good condition.
3. Gutters and Downspouts
A roof inspection should include the drainage system because water must be directed away from the roof and foundation efficiently.
Gutters collect rainwater flowing from the roof’s edges, while downspouts carry that water toward an appropriate discharge location. When these components become blocked, disconnected, or damaged, water may overflow and affect other parts of the property.
An inspector typically checks gutters and downspouts for:
- Accumulated leaves, branches, and other debris.
- Sagging sections or loose mounting brackets.
- Leaks at joints and connections.
- Corrosion, holes, or physical damage.
- Improper slope or standing water.
- Blocked downspouts and inadequate discharge.
- Water staining on fascia boards and exterior walls.
Granules accumulating in gutters may also provide clues about asphalt shingle deterioration. However, granule accumulation alone does not establish that a roof needs replacement.
Inspectors may look for signs that overflowing water has damaged siding, landscaping, soffits, or the foundation area. Poor drainage can create problems that extend well beyond the roof itself.
Homeowners should also understand that gutters are not a substitute for proper roof flashing, underlayment, or waterproofing.
Why it matters: Effective drainage reduces the risk of water backing up beneath roofing materials, damaging exterior components, and collecting near the home’s foundation.
4. Roof Valleys and Ridge Caps
Roof valleys and ridge caps are additional areas that deserve close attention during an inspection.
A roof valley is the area where two sloping roof sections meet. Valleys carry water from larger portions of the roof, making them particularly important during heavy rainfall.
The inspector examines valleys for damaged shingles or tiles, deteriorated valley flashing, accumulated debris, exposed fasteners, and signs of water collecting or entering beneath the roofing material.
The inspection method depends on the valley design. Some roofs use exposed metal valley flashing, while others use concealed or integrated waterproofing details.
Ridge caps cover the highest point where roof slopes meet. Hip caps protect the external intersections of sloping roof sections. These components help protect joints that would otherwise be vulnerable to wind-driven rain.
An inspector checks ridge and hip caps for displacement, cracks, loose sections, deteriorated mortar where applicable, and damaged sealing systems.
Wind exposure, aging materials, and poor installation can weaken these areas over time.
Why it matters: Damaged valleys and ridge caps can allow water to penetrate the roof system and may expose surrounding roofing materials to further deterioration.
5. Roof Penetrations, Pipe Boots, and Skylights
Every opening through a roof introduces a potential pathway for water intrusion. Plumbing vent pipes, exhaust vents, satellite mounts, skylights, and other roof-mounted features must be properly integrated into the roofing system.
A professional roof inspector examines the seals and flashing around these penetrations to identify defects that may not be visible from the ground.
For plumbing vents, the inspector checks the condition of pipe boots and collars. Rubber components can crack, shrink, or deteriorate after prolonged exposure to sunlight and temperature changes. Metal collars and other fittings can also loosen or corrode.
For skylights, the inspector looks for damaged glazing, deteriorated seals, defective flashing, and water staining around the interior frame.
Other penetrations are checked for loose attachments, exposed fasteners, damaged flashing, and signs that previous installation work compromised the roof’s waterproofing.
The inspector may also examine nearby ceiling surfaces or accessible attic areas to determine whether there is evidence of moisture intrusion.
Not every stain proves that a penetration is currently leaking. Water can travel along framing before appearing inside the home, and old stains may remain after a previous repair. Further evaluation may be needed to determine the source.
Why it matters: Properly maintained roof penetrations help prevent localized leaks that can damage insulation, ceilings, framing, and interior finishes.
6. Roof Decking and Structural Integrity
The roof deck is the underlying surface that supports the roofing materials. Depending on the building, it may consist of plywood, oriented strand board, timber boards, or another approved substrate.
A roof inspection includes an assessment of visible structural warning signs. Inspectors may examine the roofline from outside and review accessible roof decking and framing from inside the attic.
Potential concerns include:
- Sagging or uneven roof sections.
- Soft or deteriorated decking.
- Water stains on the underside of the roof deck.
- Signs of wood rot or prolonged moisture exposure.
- Cracked, split, or visibly damaged framing.
- Areas where previous repairs may have affected the roof assembly.
A visibly sagging roofline may indicate structural movement, excessive loading, deterioration, or another underlying issue. The cause cannot always be determined through a routine visual inspection.
Inspectors also need to distinguish between surface-level roofing damage and concerns involving the underlying structure. If significant movement, extensive rot, or compromised framing is suspected, a qualified structural professional may be necessary.
Roof decking should never be assumed to be sound simply because the exterior roofing material appears intact.
Why it matters: Structural problems can compromise the roof’s ability to support its loads and may require prompt professional evaluation beyond routine roofing repairs.
7. Attic Ventilation and Airflow
Proper attic ventilation helps manage heat and moisture within the roof assembly. When ventilation is inadequate or airflow is obstructed, moisture may accumulate and contribute to condensation, mold growth, material deterioration, or reduced insulation performance.
During an inspection, the professional examines accessible intake and exhaust ventilation components.
Intake ventilation is commonly provided through soffit or eave vents, while exhaust ventilation may use ridge vents, roof vents, or other systems appropriate to the building design.
The inspector looks for blocked vents, damaged screens, disconnected ventilation pathways, and signs that insulation or stored items are obstructing airflow.
They may also evaluate whether the ventilation arrangement appears appropriate for the roof design and applicable building requirements.
However, ventilation is not simply a matter of adding more vents. The balance between intake and exhaust, the roof’s configuration, air sealing, insulation, and local climate all influence performance.
In some homes, moisture problems arise from indoor air leaking into the attic rather than from inadequate roof ventilation alone. Bathrooms that discharge moist air into an attic can be a particular concern.
Why it matters: Appropriate ventilation and moisture management can help protect roof materials, reduce condensation risks, and support the building’s overall energy performance.
8. Insulation and Signs of Moisture in the Attic
Attic insulation is another important part of a comprehensive roof inspection, especially when the inspector has safe access to the attic.
Insulation helps limit heat transfer between the living space and the roof area. Damaged, displaced, compressed, or moisture-affected insulation may perform less effectively than intended.
An inspector may check for:
- Uneven or missing insulation.
- Damp or compressed insulation.
- Water stains on rafters and roof decking.
- Condensation on cold surfaces.
- Visible mold-like growth.
- Musty odors or signs of prolonged moisture.
- Gaps around attic access points and visible penetrations.
Water stains can reveal evidence of an earlier leak, but the inspector must consider whether the area is still wet and whether the source has been corrected.
Moisture can also originate from condensation, plumbing leaks, or indoor humidity. Identifying the correct source is essential because treating the visible stain alone may not resolve the problem.
In some circumstances, additional moisture measurements or specialist testing may be appropriate. A standard visual inspection does not necessarily establish the presence or absence of every type of mold or hidden moisture damage.
Why it matters: Identifying moisture problems early can help prevent deterioration of insulation, roof decking, framing, and interior finishes.
9. Fascia, Soffits, and Roof Edges
Fascia and soffits play important roles in protecting the edges of a roof.
Fascia is the board or finished surface along the roof edge, often where gutters are attached. Soffits cover the underside of roof overhangs and may contain intake ventilation openings.
Because these components are exposed to weather and may sit near drainage pathways, they can develop problems when water repeatedly overflows or enters through damaged roof details.
An inspector looks for peeling paint, discoloration, soft or deteriorated wood, loose panels, damaged trim, pest entry points, and visible gaps.
They may also examine the drip edge, which helps direct water away from vulnerable roof edges and into the intended drainage path.
Where soffit vents are present, the inspector checks for obstructions and visible damage. Any assessment should account for the design of the particular roof system.
Damage to fascia and soffits may indicate an isolated exterior maintenance problem, but it can also point to gutter overflow, flashing defects, or a longer-term moisture issue.
Why it matters: Healthy roof edges help protect the underlying structure, support drainage, and maintain appropriate ventilation where the roof design requires it.
10. Signs of Storm, Wind, Hail, and Environmental Damage
Severe weather can damage a roof even when the effects are not immediately obvious.
A professional roof inspection may include an assessment for damage associated with strong winds, hail, falling branches, heavy rain, or other local weather conditions.
For asphalt shingles, the inspector looks for missing or lifted shingles, damaged edges, displaced ridge caps, and impact-related marks. For metal roofing, they may examine dents, damaged coatings, loose fasteners, and separated seams.
Tile roofs can sustain cracks or displacement from impacts or other forces. Debris accumulation and damage caused by overhanging branches also deserve attention.
Environmental conditions can contribute to additional problems. Moss and algae may develop in damp, shaded areas, while prolonged sun exposure can accelerate the aging of certain materials.
Inspectors also examine areas around rooftop equipment, solar installations, and other attachments when accessible, since improper fastening or disturbed flashing can introduce water-entry points.
It is important to distinguish ordinary wear and tear from damage that may be associated with a specific weather event. The presence of a damaged component does not automatically establish when or how the damage occurred.
If storm damage is suspected, homeowners should photograph visible conditions from a safe location and contact a qualified roofing professional. Insurance coverage and claim requirements depend on the policy and circumstances.
Why it matters: Identifying weather-related damage helps homeowners determine whether immediate repairs, further evaluation, or insurance documentation may be appropriate.
11. Roof Drainage, Water Pooling, and Water Flow
In addition to checking gutters, inspectors evaluate how water moves across and away from the roof itself.
This is particularly important for low-slope and flat roofs, where drainage depends on the roof’s design, drainage outlets, and the condition of the waterproofing system.
Inspectors may look for standing water, blocked roof drains, obstructed scuppers, damaged drainage components, and signs of recurring overflow.
On sloped roofs, they examine areas where water may be diverted improperly because of debris, damaged roofing materials, or defective flashing.
Water stains beneath roof edges, discoloration around drainage outlets, and erosion near downspout discharge points can provide additional clues about drainage performance.
On low-slope roofs, persistent ponding may indicate inadequate drainage, deflection, blocked outlets, or another underlying problem. The significance depends on the roof design and system requirements; not every temporary accumulation of water indicates a defect.
The inspector may also assess whether downspouts direct water away from vulnerable areas around the foundation.
Why it matters: Efficient water management helps reduce the risk of leaks, premature material deterioration, and water-related damage to other parts of the property.
12. Previous Repairs, Workmanship, and the Final Inspection Report
The final step is to evaluate visible evidence of previous repairs and document the roof’s overall condition.
Past repairs can be helpful when properly completed, but poorly executed patching, incompatible materials, exposed fasteners, and deteriorated sealants may create new maintenance concerns.
The inspector reviews accessible repair areas to determine whether they appear consistent with the surrounding roof system and whether any defects remain visible.
They may also assess installation details, exposed fasteners, flashing integration, and other workmanship concerns where these can be evaluated without removing roofing materials.
After completing the inspection, the professional should explain the findings in a clear report.
A useful roof inspection report generally includes:
- A description of the roof and visible roofing materials.
- The areas inspected and the inspection method used.
- Photographs documenting significant findings.
- Identified damage, deterioration, and maintenance concerns.
- Areas that could not be accessed or fully evaluated.
- Recommendations for repairs, further assessment, or monitoring.
- An indication of which concerns require prompt attention.
Some reports may include an estimated remaining service life, but this should be treated as an informed estimate rather than a guarantee.
Homeowners should also ask whether the report distinguishes between urgent repairs, routine maintenance, and conditions that simply require monitoring.
A transparent report makes it easier to compare repair proposals, plan maintenance, and understand why particular recommendations have been made.
Why it matters: Proper documentation turns the inspection into a practical maintenance resource rather than a simple verbal opinion about whether the roof looks acceptable.
How Often Should You Schedule a Professional Roof Inspection?
The ideal inspection frequency depends on the roof’s age, material, condition, climate, and exposure to severe weather.
For many homes, arranging a roof assessment approximately once a year is a reasonable maintenance approach, particularly when the roof is aging or exposed to demanding weather conditions. Manufacturer recommendations, local requirements, and the advice of a qualified roofing professional may call for a different schedule.
You should also consider an inspection in the following situations:
After severe weather: Strong winds, hail, falling branches, or unusually heavy rainfall can cause damage that warrants evaluation.
Before buying a home: A roof assessment can help identify visible defects and potential maintenance expenses before you complete a purchase.
Before selling your property: Understanding the roof’s condition can help you prepare for buyer questions and plan necessary maintenance.
When you notice a leak: Water stains, peeling paint, damp ceilings, or dripping water may indicate a roofing or moisture problem that requires investigation.
As the roof ages: Older roofing systems may benefit from more frequent monitoring to help prioritize repairs and evaluate future replacement needs.
Do not wait for your next scheduled inspection if you notice active leaking, significant sagging, or other signs of potentially serious damage.
What Should You Do Before a Roof Inspection?
A little preparation can help make the inspection more useful.
Start by noting any leaks, water stains, missing roofing pieces, or recurring drainage problems you have observed. Record when the symptoms appeared and whether they became noticeable after a storm.
If available, gather records of previous roofing repairs, installation dates, material warranties, and maintenance work.
Make sure the inspector can safely access relevant areas of the property, including the attic access point where appropriate. Clear stored items away from the access opening if possible, and mention any known hazards or access restrictions.
Avoid climbing onto the roof yourself to investigate suspected damage. Wet surfaces, steep slopes, fragile materials, and concealed structural defects can make roof access dangerous.
Finally, ask what the inspection includes, whether photographs and a written report will be provided, and whether any recommended repairs fall outside the inspection’s scope.
Common Warning Signs You Should Never Ignore
Although regular inspections are important, homeowners should also recognize signs that a roof may need attention between appointments.
Watch for:
- Water stains or bubbling paint on ceilings.
- Missing, cracked, or displaced roofing materials.
- Loose or damaged flashing.
- Gutters that repeatedly overflow during rain.
- Visible sagging along the roofline.
- Damp insulation or persistent moisture in the attic.
- Daylight visible through unexpected gaps in the roof structure.
- Repeated leaks near skylights, chimneys, or plumbing vents.
These symptoms do not all indicate the same underlying problem. For example, ceiling stains may result from roof leaks, plumbing issues, or condensation. A professional assessment can help determine the likely source and appropriate next steps.
If you observe significant structural movement or an active leak near electrical equipment, prioritize safety and seek qualified assistance promptly. Do not enter an unsafe attic or climb onto a damaged roof.
Choosing the Right Professional for Your Roof Inspection
Not all roof inspections provide the same level of detail. Choosing an experienced, qualified professional can help you receive a more useful evaluation.
When comparing roofing professionals, consider the following:
Relevant experience: Look for experience with your specific roofing material and roof design.
Clear inspection procedures: Ask whether the assessment includes accessible attic areas, roof drainage, flashing, and structural warning signs.
Safety practices: A reputable professional should choose an appropriate inspection method based on roof slope, weather, material fragility, and accessibility.
Written documentation: Request a report that identifies findings, provides photographs where practical, and explains recommended next steps.
Transparent recommendations: The professional should explain the difference between necessary repairs, optional improvements, and conditions that can be monitored.
Appropriate qualifications: Check applicable licensing, insurance, certifications, and local requirements. Requirements vary by jurisdiction.
Homeowners seeking residential roofing services should also distinguish between an inspection and a repair estimate. An inspection evaluates observable conditions, while a repair estimate outlines proposed work and its cost. Some companies provide both, but the scope should be clearly explained.
It can also be useful to obtain a second opinion when a recommendation involves major repairs or complete roof replacement, especially if the available evidence does not clearly support that conclusion.
Conclusion
A roof protects your home every day, but its ability to perform reliably depends on the condition of its materials, structural components, flashing, ventilation, and drainage systems.
A thorough inspection goes beyond checking for missing shingles. It evaluates roofing materials, roof valleys, flashing, penetrations, gutters, roof decking, attic conditions, insulation, ventilation, roof edges, storm damage, drainage performance, and the quality of previous repairs.
Understanding these 12 inspection points helps homeowners recognize potential warning signs and make more informed maintenance decisions. It also makes it easier to review inspection findings, compare repair proposals, and plan for future roofing expenses.
Most importantly, a professional inspection can help identify visible problems before they lead to more extensive damage. Although no visual assessment can guarantee that every hidden defect will be discovered, a systematic inspection with clear documentation provides a valuable foundation for roof maintenance.
If you have noticed leaks, damaged roofing materials, recurring drainage issues, or signs of aging, consider arranging a professional roof inspection. Taking a proactive approach can help protect your property, support the roof’s long-term performance, and give you greater confidence in your home’s condition.
Frequently Asked Questions
1. What does a professional roof inspector check?
A professional roof inspector typically evaluates roofing materials, flashing, roof penetrations, valleys, gutters, roof edges, drainage, visible structural conditions, and accessible attic areas. The inspection may also cover ventilation, insulation, storm damage, and previous repairs.
2. How long does a roof inspection take?
The duration depends on the roof’s size, complexity, material, accessibility, and inspection scope. A straightforward residential assessment may take around 30–60 minutes, while larger or more complex properties may require additional time. Attic access and further investigation can also affect the duration.
3. Can a roof inspection detect hidden leaks?
An inspection may identify signs of concealed leaks, including water stains, damp insulation, deteriorated decking, and moisture around roof penetrations. However, some leaks are intermittent or concealed within the building assembly, so additional testing or investigation may be necessary.
4. Is a roof inspection necessary if there are no visible leaks?
Yes. Some roofing defects develop before water reaches the interior. Loose flashing, deteriorating seals, damaged roofing materials, and drainage problems may be detectable before obvious indoor symptoms appear.
5. Does a roof inspection mean the roof needs replacement?
No. An inspection evaluates the roof’s condition and identifies appropriate next steps. Depending on the findings, the recommendation may involve routine maintenance, localized repairs, further evaluation, or replacement. A roof’s age alone does not automatically establish that replacement is necessary.
6. Should I inspect my roof after a storm?
An inspection may be appropriate after severe wind, hail, falling branches, or other damaging weather. Avoid climbing onto the roof yourself. A qualified professional can assess visible damage safely and document findings where appropriate.
7. What should a roof inspection report include?
A useful report should identify the inspection scope, describe significant findings, include photographs when practical, explain access limitations, and recommend suitable next steps. It should clearly distinguish urgent concerns from routine maintenance and conditions that can be monitored.
8. Can regular roof inspections help reduce repair costs?
Regular inspections can help identify certain problems while they are still relatively localized, potentially reducing the risk of more extensive damage. However, inspections cannot prevent every failure or guarantee lower repair costs. Their primary benefit is providing timely information for maintenance and repair decisions.