
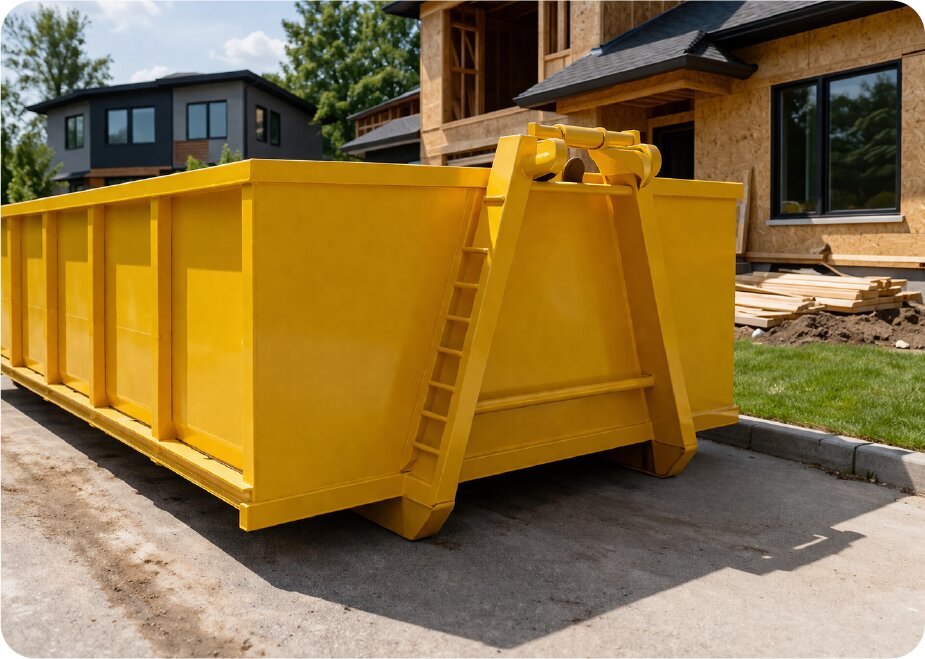
Whether you’re cleaning out a garage, remodeling a kitchen, replacing a roof, or managing debris from a construction project, waste can accumulate faster than expected. A container provides a practical way to collect unwanted materials in one place instead of making repeated trips to a landfill or transfer station. However, choosing the wrong size, overlooking restricted materials, or misunderstanding rental terms can create unnecessary expenses and delays.
Before arranging a dumpster rental, take time to understand how container sizes, weight limits, delivery access, and disposal rules affect your project. A little planning can help you avoid unexpected fees, keep the worksite organized, and make waste removal easier from start to finish.
The best choice depends on what you’re throwing away, how much debris you expect to generate, and how long your project will take. Understanding these factors before placing an order helps you choose a container that fits your needs without paying for capacity you won’t use.
Understanding Dumpster Sizes and Their Uses
Roll-off dumpsters are available in several sizes, commonly measured in cubic yards. One cubic yard represents a volume of 3 feet long, 3 feet wide, and 3 feet high. Although exact dimensions vary by provider, capacity is a useful starting point when comparing containers.
A 10-yard dumpster is often suitable for small garage cleanouts, minor landscaping projects, and limited renovation work. A 15-yard or 20-yard container may work better for flooring removal, basement cleanouts, or medium-sized remodeling projects. Larger 30-yard and 40-yard containers are commonly used for major renovations, commercial cleanouts, and construction projects that generate substantial debris.
However, volume alone doesn’t determine whether a container is appropriate. Heavy materials such as concrete, brick, soil, and roofing shingles can reach weight limits before a dumpster is full.
For example, removing old kitchen cabinets and drywall produces relatively bulky debris, while demolishing a concrete patio generates dense material. Even if both projects produce similar-looking piles, their weight requirements can differ significantly.
When estimating capacity, consider both the amount and type of waste. If your project includes unusually heavy materials, ask the provider whether a dedicated heavy-debris container is available.
How to Choose the Right Dumpster Before Ordering
Selecting the right container involves more than estimating how much space your debris will occupy. Follow these practical steps before confirming a delivery.
Step 1: Identify the Waste Your Project Will Generate
Start by listing the materials you expect to discard. Common household and construction waste includes furniture, packaging, drywall, wood, flooring, roofing materials, and yard debris.
Separate heavy materials from lighter waste whenever possible. This makes it easier to determine whether you need a standard container or a specialized option.
Also, identify materials that may require separate disposal. Paint, solvents, automotive fluids, batteries, and certain electronic products may be restricted or subject to special handling requirements. Never assume that every item can go into the same container.
Step 2: Estimate the Total Volume
Walk through the project area and estimate the number of bags, furniture pieces, boxes, or debris piles you’ll remove. For renovation projects, consider how much material will be generated during demolition rather than judging only by the room’s current contents.
A small bathroom renovation might produce several cubic yards of tile, drywall, cabinetry, and fixtures. A full-house cleanout could require substantially more space, particularly when mattresses, sofas, and bulky furniture are involved.
If your estimate falls between two sizes, compare the additional rental cost with the possibility of needing a second container. A modest increase in capacity can sometimes be more economical than arranging another delivery and pickup.
Step 3: Confirm Weight Limits and Included Tonnage
Many rental agreements include a specified weight allowance. If the loaded container exceeds that allowance, additional charges may apply.
Ask how the provider calculates excess weight and whether disposal fees are included in the quoted price. This is particularly important for roofing projects, where shingles can become surprisingly heavy as the removed material accumulates.
For example, a contractor replacing an older roof should estimate the amount of shingle waste and confirm that the selected container can handle the expected load. Choosing based only on volume may result in a container that cannot legally or safely be transported.
Step 4: Check Delivery Access
Measure the driveway, gate, or designated placement area before scheduling delivery. Consider overhead wires, low tree branches, parked vehicles, and nearby structures.
Roll-off trucks need adequate space to maneuver and position the container. The delivery area must also support the equipment and loaded dumpster without creating unacceptable damage risks.
If the container will sit on asphalt, concrete, or decorative pavers, ask whether protective boards can be placed underneath it. Confirm placement instructions with the provider instead of assuming the driver can use any available space.
Step 5: Review Rental Terms and Schedule Delivery
Ask how many rental days are included, when the rental period begins, and what happens if the project takes longer than expected. Some companies charge daily extension fees, while others offer different rental packages.
Coordinate delivery with the actual start of work. Ordering a container too early may mean paying for unused days, while scheduling it too late can leave workers with nowhere to place demolition debris.
Common Mistakes That Can Increase Rental Costs
Even a straightforward waste removal project can become more expensive when important details are overlooked.
One frequent mistake is choosing a container that’s too small. Homeowners sometimes underestimate the volume of bulky furniture, broken cabinetry, or demolition debris. If the dumpster fills before the job ends, a replacement or additional container may be necessary.
Another problem is loading materials above the fill line. Most providers require debris to remain below the designated maximum fill level so the container can be covered and transported safely. Overfilled containers may be refused for pickup until the load is corrected.
Ignoring prohibited items can also cause delays and additional handling charges. Refrigerators, tires, hazardous chemicals, and certain appliances may require separate arrangements. Restrictions vary by provider and local regulations, so confirm the rules before loading questionable materials.
Finally, don’t compare rental quotes based solely on the advertised price. A low initial rate may exclude delivery, disposal, taxes, excess tonnage, or additional rental days. Reviewing the complete pricing structure provides a more realistic picture of the total expense.
Practical Tips for a Smoother Dumpster Rental Experience
A few simple practices can make waste removal safer, more efficient, and easier to manage.
Create a loading plan before work begins. Place heavy materials toward the bottom when permitted, distribute weight evenly, and break down bulky items when practical. Never climb inside the container to rearrange debris or attempt to compact it using unsafe methods.
Keep prohibited materials separate. Designate a storage area for paint, batteries, electronics, and other items that may require special disposal. This reduces the risk of accidentally contaminating an otherwise acceptable load.
Protect the delivery area. Clear vehicles and obstacles before the truck arrives. If you’re placing the dumpster on a driveway, photograph the area beforehand and discuss any concerns about surface damage with the provider.
Maintain a realistic project timeline. Demolition often reveals unexpected work, such as damaged subflooring or additional layers of old roofing. Build some flexibility into your schedule and understand the cost of extending the rental period.
Ask questions before signing. Confirm the container size, included weight allowance, prohibited materials, pickup process, and complete price. Request clarification about any terms that could trigger additional charges.
For contractors, property managers, and homeowners handling several projects, keeping a simple record of debris volumes and actual container usage can improve future estimates. Over time, this information helps identify the most economical size for recurring jobs.
Conclusion
Ordering a dumpster becomes much easier when you understand your project’s waste volume, material weight, site access requirements, and rental conditions. Choosing the right container involves balancing capacity with weight limits while accounting for disposal rules and scheduling needs.
Before confirming an order, identify the materials you’ll discard, estimate the amount of debris, inspect the delivery area, and review the full rental agreement. These straightforward steps can reduce unexpected costs, prevent pickup delays, and help your cleanup or construction project run more smoothly.